
How do I add an announcement?
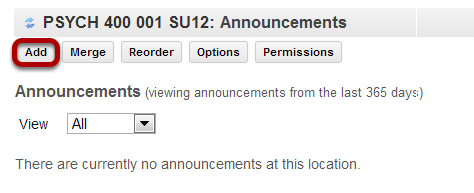
Go to the Announcements tool
Select the Announcements tool from the Tool Menu of your site.
Click Add
Title your announcement and add content.
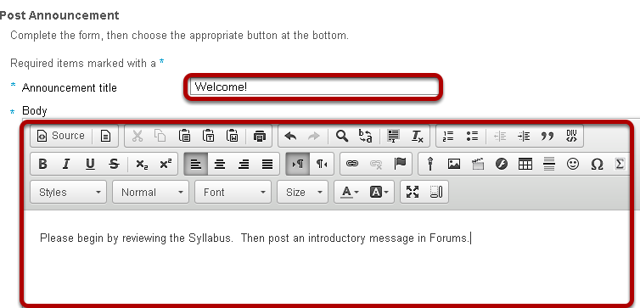
Give your announcement a title, and then enter the content of the announcement into the rich text editor. You may use the formatting options in the editor to modify the font size or color, add images or links, or embed other content.
Determine who can view the announcement.
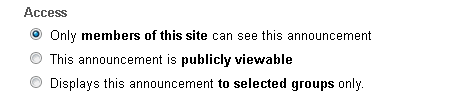
By default, all people enrolled in this site see the announcement.
Making the announcement "publicly viewable" means that you can send a link to the announcement to people outside the course, even outside your instance of Sakai, and the announcement will be viewable by them.
Give announcement to group(s). (Optional)
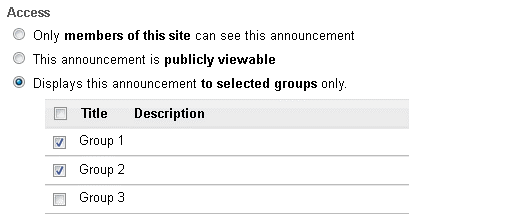
If you have created groups in your course, the option to display to groups is shown. Select the group(s) you want to see the announcement. Only these people will see this announcement.
Select when the announcement will be displayed.
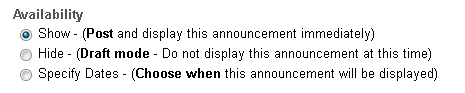
By default, the announcement is displayed immediately upon posting. You can also choose to hide it (saving as a draft until you are ready to post it), or you may specify dates when the announcement will be available.
Select availability dates. (Optional)
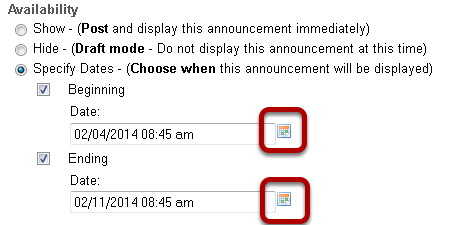
If you want the announcement to display during a specific time frame, choose Specify Dates. Select the box beside Beginning and/or Ending and click the calendar icon to insert the properly formatted date and time when the announcement will begin and/or end.
Use calendar icon to insert date and time.
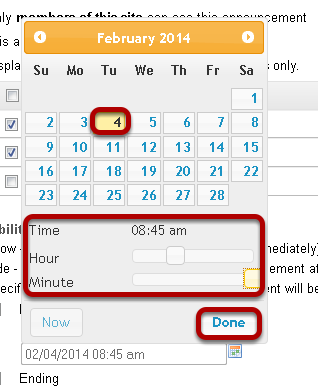
Click the date on the calendar, and use the sliders to select the time. Then click Done.
Add attachments. (Optional)
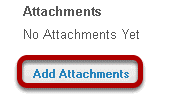
Click the Add Attachments button
Browse for the file.
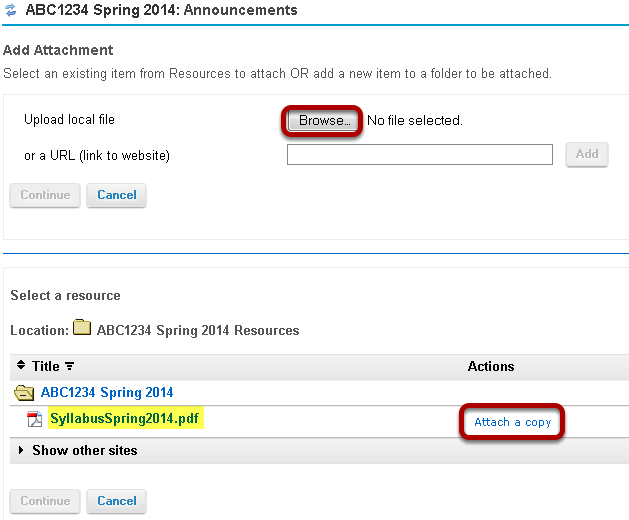
If the file is not already in your Resources in the course, click Browse to locate the file on your computer. Click Continue to attach the file.
If the file is in your Resources, click Attach a copy to the right of the file. Click Continue to attach the file.
Notify participants of announcement by email. (Optional)
By default, no email notification is sent. You may also select:
• High - All participants to send an email to everyone in the course.
• Low - Not received by those who have opted out to send to everyone except people who have intentionally changed their settings so that they don't receive low priority messages.
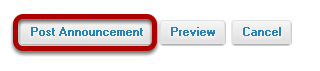
Click Post Announcement.
» Download Training Guide
How do I edit an announcement?
Go to Announcements.
Select the Announcements tool from the Tool Menu of your site.
Click Edit below the title of the announcement.
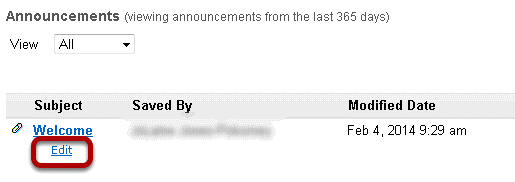
Make your edits.
How do I delete an announcement?
Go to Announcements.
Select the Announcements tool from the Tool Menu of your site.
Select the announcement.
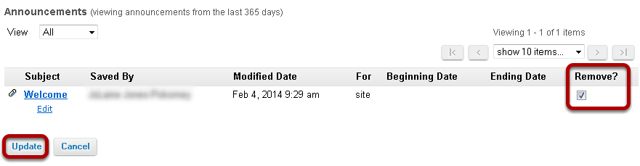
Select the check box in the "Remove?" column for the announcement you would like to delete, and then click Update.
Confirm deletion message.
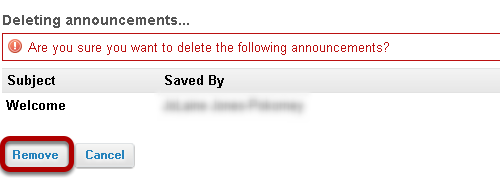
Click Remove.
» Download Training Guide
What is the Schedule/Calendar tool?
The Schedule tool allows instructors or site organizers to post events in a calendar format. The calendar has day, week, month, year, and simple list views.
The Schedule can be used to post important dates in a class, such as start and end dates, assessment dates, etc.
Project sites may use Schedule to post key dates, such as deadlines.
All calendars from all sites you have access to are merged in your My Workspace Schedule.
Note: In some cases, local instances of Sakai have renamed the Schedule tool as Calendar on a system-wide basis; therefore, you may see it called the Calendar tool rather than Schedule tool.
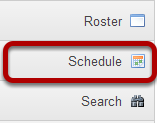
To access this tool, select Schedule from the Tool Menu of your site.
How do I customize my Schedule/Calendar display?
The Calendar tool (also referred to as the Schedule tool) can be customized according to your individual display preferences.
Calendar Options
To modify the display, select the Options button.
Display Settings
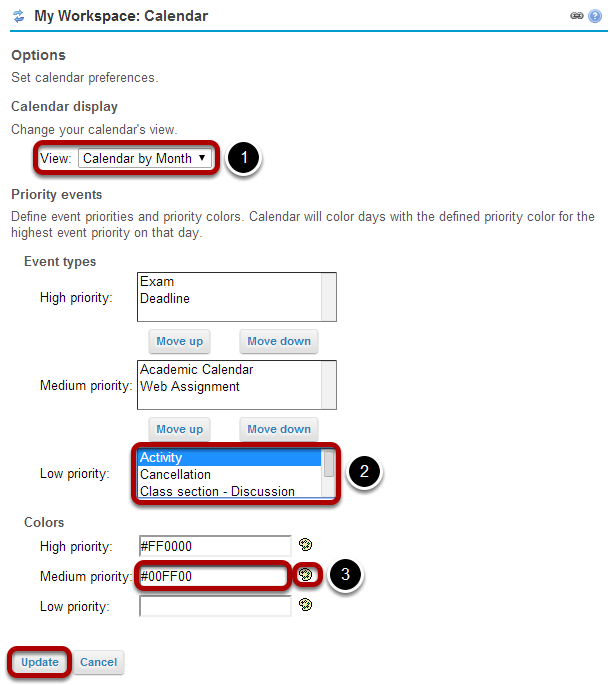
1. The drop-down menu under Calendar Display allows you to select your default view by Month or by Day.
2. You may define High, Medium, or Low priority for items on the Calendar. This will change the color of the item as it is displayed on your Calendar. Click on an item type in the list and select the Move Up or Move Down buttons to change the priority level of that item.
3. You may also specify custom colors for different priority levels. You may indicate the color by typing in a numerical Hex color value, or by clicking on the color palate icon to bring up a selection of web colors from which to choose.
4. Don't forget to click Update to save any changes.
» Download Training Guide
Engagement Tools

Kahoot Guide
Mentimeter Guide
Poll Everywhere Guide
What is the Chat Room tool?
The Chat Room is a real-time, text-only chat tool within a site.
The Chat Room tool can be used for synchronous, unstructured conversations among site participants who are logged into the site at the same time. Only participants enrolled in the same site may chat using the Chat Room.
The Chat Room tool supports multiple rooms and the default room can be set by the site owner. For example, instructors may choose to create an "Online Office Hours" chat room for student questions and answers. Chat rooms for student groups can also be set up as a space to collaborate among group members across distances.
The Chat Room tool alerts users to other participants who have entered the same chat room. This way, users know who is available to talk.
Site owners can specify how many chat messages are archived and for how long, or they can allow participants to configure their own archive settings.
The Chat Room tool does not provide a way to chat privately. By default, all messages are visible to all participants.
To access this tool, select Chat Room from the Tool Menu in your site.

How do I read, post, or delete Chat Room messages?
Go to Chat Room.
Select the Chat Room tool from the Tool Menu in your site.
To read Chat Room messages:
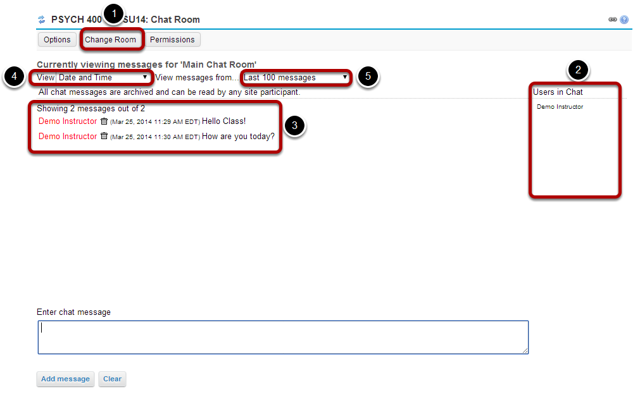
1. When you click Chat Room, you will enter the default room (as specified by the site leader). To change rooms, click Change Room at the top, and select the room you'd like to enter.
2. To see who is presently in the room, look under "Users in Chat" on the right side of the screen.
3. Messages appear in chronological order, with the most recent at the bottom. Messages will always identify the sender.
4. To hide or display the date or time messages were posted, select the appropriate option from the "View" drop-down list: Time Only, Date and Time, Date Only, Neither Date nor Time, or ID Only.
5. To change how many messages you see, from the second drop-down list, select one of the following options: All Messages, Last 10 messages, Past 3 days, or Show no message history. (If you choose Show no message history, you will see only messages posted after you made this selection.)
To post Chat Room messages:

In the text box at the bottom of the window, type your message, and then click Add message.
Note: No one can see your message until you click Add message, but once you do, only an instructor or a participant with special permission can delete your message.
To discard a message that you haven't sent yet, click Clear.
To delete a Chat Room messages.
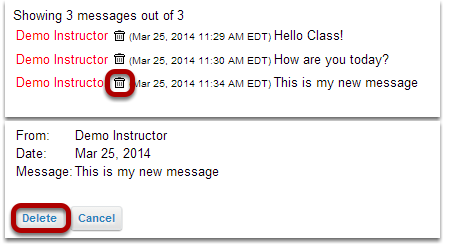
To delete a Chat Room message that you have sufficient permission to delete, click the trash can icon next to the posting, and then click Delete.
Note: If you don't see a trash can icon, you don't have permission to delete the message.
Tip: To permanently delete all messages from a chat room, click Options, and then click Clear History. Click Delete to confirm.
» Download Training Guide
What is the Drop Box tool?
The Drop Box tool creates a folder for each student in the course. Students are only able to access their own folder. Students and instructors can both place files in the Drop Box folders.
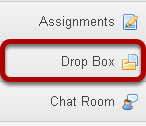
To access this tool, select Drop Box from the Tool Menu in your site.
How do I add items to the Drop Box?
The Drop Box tool functions very much like the Resources tool. The only difference is that Drop Box is an individual folder for each student within a particular course.
Go to Drop Box.
Select the Drop Box tool from the Tool Menu in your site.
Add or create items.
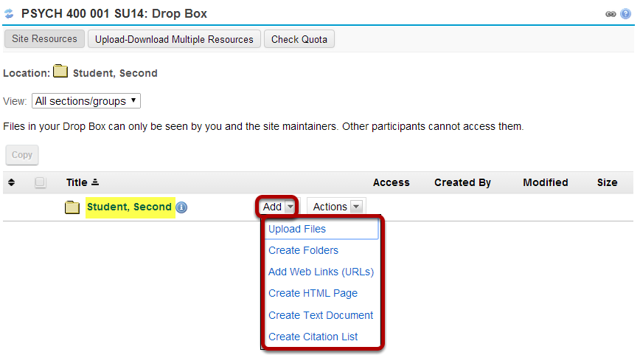
You will see a Drop Box folder with your name as the folder name. This is the location where you will add or create items in the Drop Box.
Click the Add drop-down menu to complete any of the following tasks.
- Upload Files
- Create Folders
- Add Web Links (URLs)
- Create HTML Page
- Create Text Document
- Create Citation List
» Download Training Guide
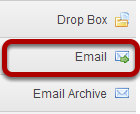
What is the Email tool?
The Email tool allows user to send an email message to site participants by role, section, or group, and also provides a field for specifying non-site participant email addresses.
To access this tool, select the Email tool from the Tool Menu of your site.
How do I send an Email message?
Go to Email.
Select the Email tool from the Tool Menu of your site.
Select the message recipients.
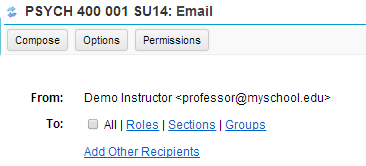
When you compose a message in the Email tool, you have the option to select recipients in the course by role, section, or group.
You may also add other recipients who are not enrolled in the course.
Select All.
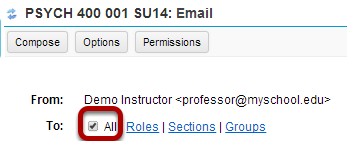
Click to place a check mark next to All to send an email to everyone in the site.
Choose recipients by role.
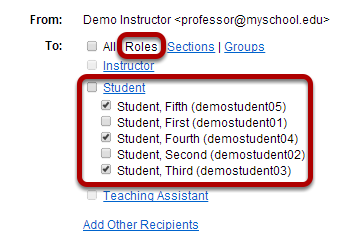
Click the Roles link to expand the list of roles within the site. You may also click on the link for a role (e.g. Student) to expand the list and show individual users.
Place a check mark next to the roles and/or individual recipients you would like to address in your message.
Choose recipients by section.
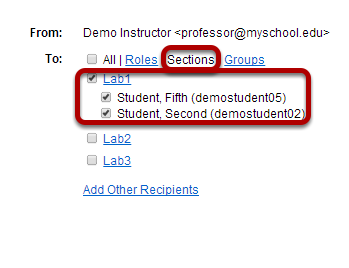
Click the Sections link to expand the list of existing sections within the site. You may also click on the link for a section (e.g. Lab1) to expand the list and show individual users in that section.
Place a check mark next to the sections you would like to address in your message.
Choose recipients by group.
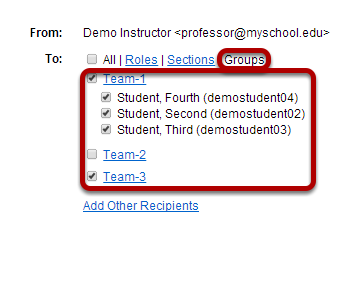
Click the Groups link to expand the list of existing groups within the site. You may also click on the link for a group (e.g. Team-1) to expand the list and show individual users in that group.
Place a check mark next to the groups you would like to address in your message.
Enter a subject line.

Give your email message a subject.
Add an attachment. (Optional)

Click the Attach a file link if you would like to browse for and attach a file to your email.
Enter the message body text.
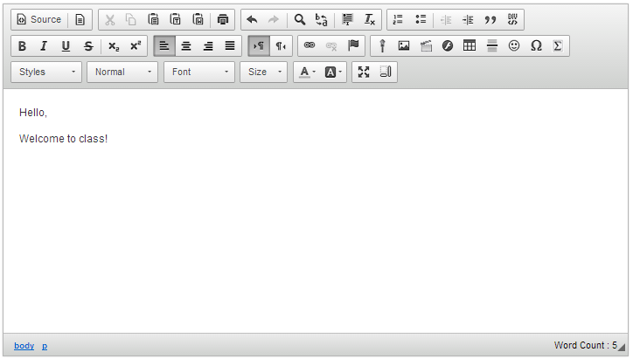
Use the Rich Text Editor to compose your message.
Select to receive a copy. (Optional)
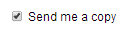
If you would like to be copied on the email message, click the box next to Send me a copy.
Select to add to Email Archive. (Optional)

If you would like the email message to be added to the course Email Archive, click the box next to Add to Email Archive, visible to all site participants.
Note: This option only appears if the Email Archive tool is active in your site.
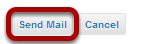
Click Send Mail.
The message will be sent using your external email address as specified for your user account in the system.
» Download Training Guide
What is the Email Archive tool?
The Email Archive tool allows site managers to specify an alias email address which essentially serves as a listserv for the site. By default, email you send to the site email address is copied to the email addresses of all site participants and owners. All email messages sent to your site's email address are stored in the Email Archive. You can use any email program to send mail to the email address listed at the top of your Email Archive page.
Site members can use Preferences in My Workspace to choose how often they want to receive email sent to the site's email address: either as it is sent, or in digest mode, with all posts for the day sent in a single email message.
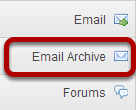
To access this tool, select Email Archive from the Tool Menu in your site.
How do I view archived messages?
Go to Email Archive.
Select the Email Archive tool from the Tool Menu in your site.
Viewing Email Archive messages.
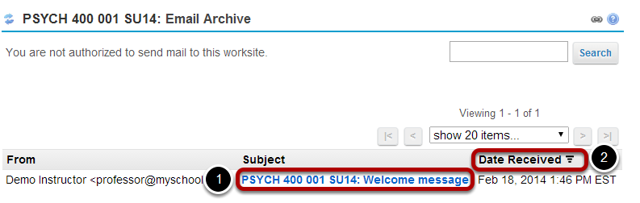
All of the messages that have been sent to the course Email Archive will be displayed.
1. Click on a message subject to view the message content.
2. Clicking a column header (From, Subject, or Date Received) will sort the email messages by that header. Click the header again to reverse the order.
» Download Training Guide
Forums Notifications
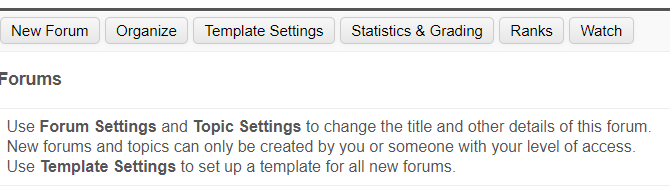
- Go into the Sakai course site where the Forum exists
- In the course menu on the left, click the Forums button
- At the top, click on the Watch button
- Click the radio button beside No Notification, and click Save

Printing Forums
1. Once in Forums, select the Topic to print.
2. Under that Topic, there will be a list of posted threads. Notice the Print icon in the upper right. Click this icon. Note: Clicking Print at this level will print every thread within the Topic, including the reply posts.
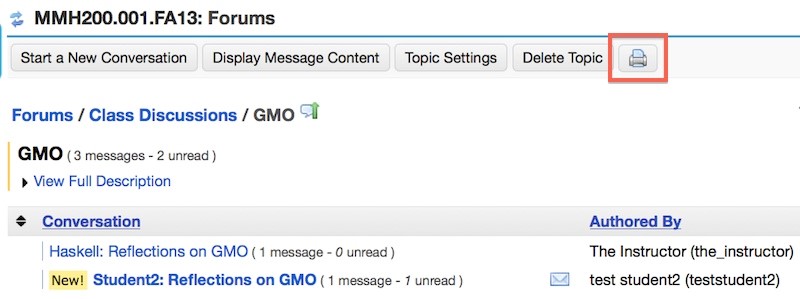
3. A new window will open, displaying what is about to be printed. In the upper left of the window, click Send To Printer. This will open the print dialog box where you can select your print options. If you wanted to print the Topic in its entirety, go one step further in the Forum hierarchy so that you are only looking at a specific thread. The Print icon is available here as well, so let's click it.

5. Click Send To Printer to open your print dialog box and continue to select your print options.
» Download Training Guide
» LMS Forums Tool Guide
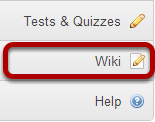
What is the Wiki tool?
The Wiki tool allows people to collaboratively author web pages, without the need for advanced web authoring skills. The Wiki tool was designed specifically for site participants to collaborate on documents, share information and create online materials within a course or project site. Users have the option to subscribe to the site Wiki and be notified about content updates. There is also the option to make wiki pages available to the outside world beyond the course if desired.
To access this tool, select Wiki from the Tool Menu in your site.
![]()